Raspicade
vendredi 2 mai 2014, par

Raspicade est une distribution pour l’arcade sur Raspberry Pi. Elle est basée sur Moebius Linux et utilise 4 émulateurs optimisés pour cette architecture : Mame4all-pi, piFBA, pi-SNES9x and GnGeo. Le système démarre automatiquement sur le programme Pimenu qui permet de choisir l’émulateur à lancer. Le système supporte le très connu module arcade Xin-Mo http://www.xin-mo.com/?page_id=34.
- Raspicade peut être utilisées avec des gamepad ;
- Raspicade peut être utilisée avec une module arcade Xin-Mo ;

Téléchargement de Raspicade
Raspicade est hébergée sur SourceForge https://sourceforge.net/projects/ra.... Ce site contient un wiki en langue anglaise.
Don
Si vous aimez le projet et désirez l’aider, un petit don sera très apprécié :
Les sources de Raspicade sur GitHub
Les sources de Raspicade sont hébergées sur GitHub https://github.com/raspicade
Documentation de Raspicade
Voici la documentation de Raspicade (v0.4) :
- http://morere.eu/storage/manuel_ras...
- http://morere.eu/storage/manuel_ras...
- http://morere.eu/storage/booklet_ma...
Documentation en anglais :
- http://morere.eu/storage/manuel_ras...
- http://morere.eu/storage/manuel_ras...
- http://morere.eu/storage/manuel_ras...
Presentation de Raspicade
Nouvelle version de raspicade intégrant EmulationStation et Dgen/Picodrive
Projet utilisant Raspicade
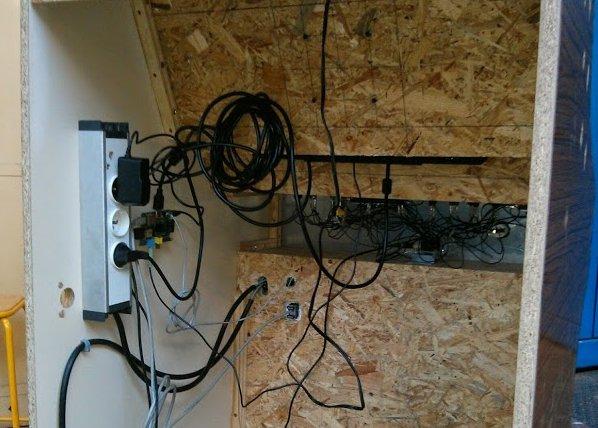
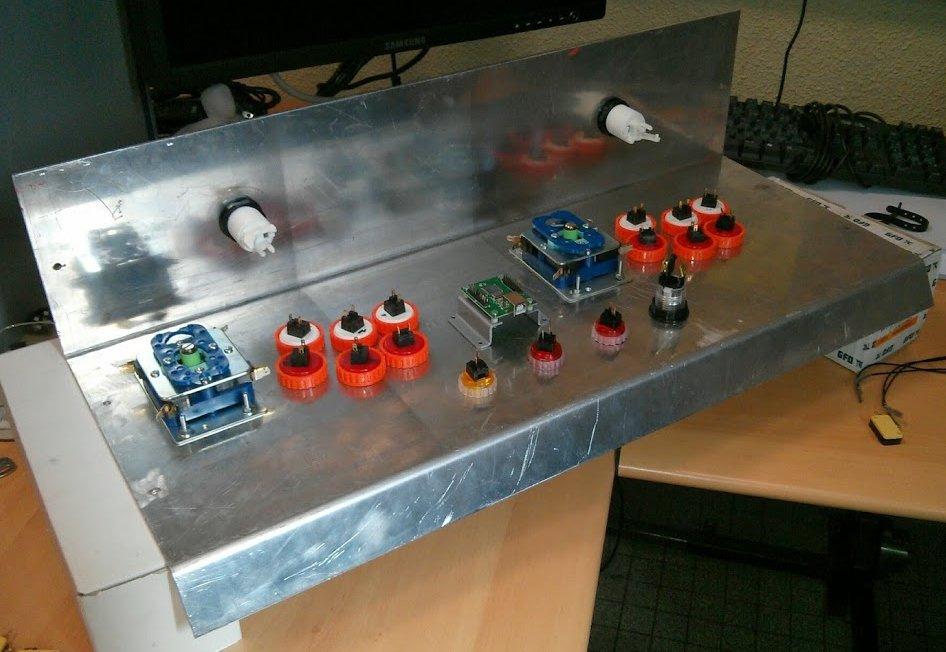
Microborne Jeutel :
Une borne arcade « faite maison » utilisant raspicade et le module Xin-Mo :
Un micro bartop espagnol :
Un bartop utilisant Raspicade :
Raspicade + Xin-Mo -> SmallCade
Patch du noyau linux
Depuis la version 3.12.25 du noyau le patch du noyau n’est plus nécessaire
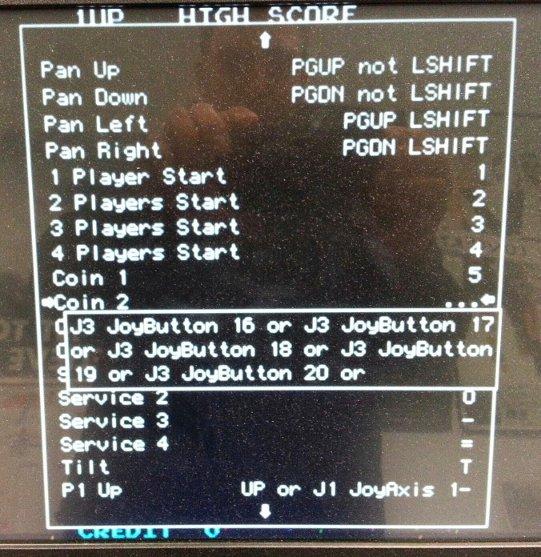
La particularité du module Xin-Mo 2 joueurs sous linux est qu’il est reconnu comme un seul joystick comprenant 4 axes et 22 boutons. Ce module est très pratique et bien moins cher qu’un encodeur clavier de type IPAC. Vous pouvez le trouver chez le webmarchant SmallCab.
Cependant les noyaux récents (dont les versions 3.10 utilisées dans les distributions raspbian et moebius) possède un bug avec les modules Xin-Mo : les valeurs retournées par le module pour les positions Haut et Gauche sont en dehors des intervalles prévus, et le noyau les ignore. L’effet direct est que qu’il n’est pas possible de se déplacer vers le haut et vers la gauche.
La commande evtest, permet de caractériser le problème :
Les pins 13 et 15 ne revoient pas d’information alors qu’elles devraient renvoyer la valeur -1 pour l’axe du joystick.
pi@raspberrypi ~ $ evtest
No device specified, trying to scan all of /dev/input/event*
Not running as root, no devices may be available.
Available devices:
/dev/input/event0:	2.4G Wireless Touchpad Keyboard
/dev/input/event1:	2.4G Wireless Touchpad Keyboard
/dev/input/event2:	THT THT Arcade console 2P USB Player
/dev/input/event3:	CHICONY HP Basic USB Keyboard
Select the device event number [0-3]: 2
Input driver version is 1.0.1
Input device ID: bus 0x3 vendor 0x16c0 product 0x5e1 version 0x101
Input device name: "THT THT Arcade console 2P USB Player"
Supported events:
  Event type 0 (EV_SYN)
  Event type 1 (EV_KEY)
    Event code 288 (BTN_TRIGGER)
    Event code 289 (BTN_THUMB)
    Event code 290 (BTN_THUMB2)
    Event code 291 (BTN_TOP)
    Event code 292 (BTN_TOP2)
    Event code 293 (BTN_PINKIE)
    Event code 294 (BTN_BASE)
    Event code 295 (BTN_BASE2)
    Event code 296 (BTN_BASE3)
    Event code 297 (BTN_BASE4)
    Event code 298 (BTN_BASE5)
    Event code 299 (BTN_BASE6)
    Event code 300 (?)
    Event code 301 (?)
    Event code 302 (?)
    Event code 303 (BTN_DEAD)
    Event code 304 (BTN_A)
    Event code 305 (BTN_B)
    Event code 306 (BTN_C)
    Event code 307 (BTN_X)
    Event code 308 (BTN_Y)
    Event code 309 (BTN_Z)
  Event type 3 (EV_ABS)
    Event code 0 (ABS_X)
      Value      0
      Min       -1
      Max        1
    Event code 1 (ABS_Y)
      Value      0
      Min       -1
      Max        1
    Event code 2 (ABS_Z)
      Value      0
      Min       -1
      Max        1
    Event code 3 (ABS_RX)
      Value      0
      Min       -1
      Max        1
  Event type 4 (EV_MSC)
    Event code 4 (MSC_SCAN)
Properties:
Testing ... (interrupt to exit)
Event: time 1396096978.535889, type 3 (EV_ABS), code 0 (ABS_X), value 1
Event: time 1396096978.535889, -------------- SYN_REPORT ------------
Event: time 1396096978.743919, type 3 (EV_ABS), code 0 (ABS_X), value 0
Event: time 1396096978.743919, -------------- SYN_REPORT ------------
Event: time 1396096987.209066, type 3 (EV_ABS), code 1 (ABS_Y), value 1
Event: time 1396096987.209066, -------------- SYN_REPORT ------------
Event: time 1396096987.385093, type 3 (EV_ABS), code 1 (ABS_Y), value 0
Event: time 1396096987.385093, -------------- SYN_REPORT ------------
Un programmeur a créé un patch pour corriger ce problème : http://ithink.ch/blog/2013/09/08/pa....
Il faut donc recompiler une noyau Linux pour le raspberry pi, l’installer puis le tester.
Les étapes sont décrites dans ce même article. Un fois le tout réalisé, on vérifie le bon fonctionnement de la modification :
On branche le module et on vérifie que le module est reconnu :
[  285.035573] usb 1-1.3.2: new low-speed USB device number 8 using dwc_otg
[  285.145233] usb 1-1.3.2: New USB device found, idVendor=16c0, idProduct=05e1
[  285.145298] usb 1-1.3.2: New USB device strings: Mfr=1, Product=2, SerialNumber=0
[  285.145320] usb 1-1.3.2: Product: THT Arcade console 2P USB Player
[  285.145336] usb 1-1.3.2: Manufacturer: THT
[  285.214536] input: THT THT Arcade console 2P USB Player as /devices/platform/bcm2708_usb/usb1/1-1/1-1.3/1-1.3.2/1-1.3.2:1.0/input/input3
[  285.216642] xinmo 0003:16C0:05E1.0004: input,hidraw3: USB HID v1.01 Joystick [THT THT Arcade console 2P USB Player] on usb-bcm2708_usb-1.3.2/input0
On contrôle les modules chargés et on remarque que le module hid_xinmo est présent :
pi@raspberrypi ~ $ lsmod
Module                  Size  Used by
hid_xinmo               1108  0
snd_bcm2835            16118  0
snd_soc_bcm2708_i2s     5462  0
regmap_mmio             2778  1 snd_soc_bcm2708_i2s
snd_soc_core          132437  1 snd_soc_bcm2708_i2s
snd_compress            8093  1 snd_soc_core
regmap_i2c              1633  1 snd_soc_core
regmap_spi              1928  1 snd_soc_core
snd_pcm                82166  2 snd_bcm2835,snd_soc_core
snd_page_alloc          5132  1 snd_pcm
snd_seq                53717  0
snd_seq_device          6473  1 snd_seq
snd_timer              20049  2 snd_pcm,snd_seq
leds_gpio               2118  0
led_class               3710  1 leds_gpio
8192cu                547322  0
snd                    61352  7 snd_bcm2835,snd_soc_core,snd_timer,snd_pcm,snd_seq,snd_seq_device,snd_compress
evdev                   9439  0
joydev                  9072  0
Ensuite on teste le fonctionnement du module avec le programme evtest
pi@raspberrypi ~ $ evtest
No device specified, trying to scan all of /dev/input/event*
Not running as root, no devices may be available.
Available devices:
/dev/input/event0:	2.4G Wireless Touchpad Keyboard
/dev/input/event1:	2.4G Wireless Touchpad Keyboard
/dev/input/event2:	CHICONY HP Basic USB Keyboard
/dev/input/event3:	THT THT Arcade console 2P USB Player
Select the device event number [0-3]: 3
Input driver version is 1.0.1
Input device ID: bus 0x3 vendor 0x16c0 product 0x5e1 version 0x101
Input device name: "THT THT Arcade console 2P USB Player"
Supported events:
  Event type 0 (EV_SYN)
  Event type 1 (EV_KEY)
    Event code 288 (BTN_TRIGGER)
    Event code 289 (BTN_THUMB)
    Event code 290 (BTN_THUMB2)
    Event code 291 (BTN_TOP)
    Event code 292 (BTN_TOP2)
    Event code 293 (BTN_PINKIE)
    Event code 294 (BTN_BASE)
    Event code 295 (BTN_BASE2)
    Event code 296 (BTN_BASE3)
    Event code 297 (BTN_BASE4)
    Event code 298 (BTN_BASE5)
    Event code 299 (BTN_BASE6)
    Event code 300 (?)
    Event code 301 (?)
    Event code 302 (?)
    Event code 303 (BTN_DEAD)
    Event code 304 (BTN_A)
    Event code 305 (BTN_B)
    Event code 306 (BTN_C)
    Event code 307 (BTN_X)
    Event code 308 (BTN_Y)
    Event code 309 (BTN_Z)
  Event type 3 (EV_ABS)
    Event code 0 (ABS_X)
      Value      0
      Min       -1
      Max        1
    Event code 1 (ABS_Y)
      Value      0
      Min       -1
      Max        1
    Event code 2 (ABS_Z)
      Value      0
      Min       -1
      Max        1
    Event code 3 (ABS_RX)
      Value      0
      Min       -1
      Max        1
  Event type 4 (EV_MSC)
    Event code 4 (MSC_SCAN)
Properties:
Testing ... (interrupt to exit)- Pour le joueur 1 : On branche la masse en pin 9. Ensuite on branche successivement les pins 11 12 13 et 14 et on appuie sur une bouton Player one pin 11 12 13 14 → → Droite Gauche Haut et Bas : on doit obtenir les code suivants (value = 1 0 et -1 pour le joystick)
Properties:
Testing ... (interrupt to exit)
Event: time 1396163394.891907, type 3 (EV_ABS), code 0 (ABS_X), value 1
Event: time 1396163394.891907, -------------- SYN_REPORT ------------
Event: time 1396163395.035925, type 3 (EV_ABS), code 0 (ABS_X), value 0
Event: time 1396163395.035925, -------------- SYN_REPORT ------------
Event: time 1396163401.148755, type 3 (EV_ABS), code 0 (ABS_X), value -1
Event: time 1396163401.148755, -------------- SYN_REPORT ------------
Event: time 1396163401.340781, type 3 (EV_ABS), code 0 (ABS_X), value 0
Event: time 1396163401.340781, -------------- SYN_REPORT ------------
Event: time 1396163431.008814, type 3 (EV_ABS), code 1 (ABS_Y), value 1
Event: time 1396163431.008814, -------------- SYN_REPORT ------------
Event: time 1396163431.152831, type 3 (EV_ABS), code 1 (ABS_Y), value 0
Event: time 1396163431.152831, -------------- SYN_REPORT ------------
Event: time 1396163436.033493, type 3 (EV_ABS), code 1 (ABS_Y), value -1
Event: time 1396163436.033493, -------------- SYN_REPORT ------------
Event: time 1396163436.193522, type 3 (EV_ABS), code 1 (ABS_Y), value 0
Event: time 1396163436.193522, -------------- SYN_REPORT ------------
- Joueur 2 : On branche la masse en pin 18. Ensuite on branche successivement les pins 1 2 3 et 4 et on appuie sur une bouton player 2 pin 1 2 3 4 → Droite Gauche Haut et Bas : on doit obtenir les code suivants (value = 1 0 et -1 pour le joystick)
Event: time 1396163736.162272, type 3 (EV_ABS), code 2 (ABS_Z), value 1
Event: time 1396163736.162272, -------------- SYN_REPORT ------------
Event: time 1396163736.306294, type 3 (EV_ABS), code 2 (ABS_Z), value 0
Event: time 1396163736.306294, -------------- SYN_REPORT ------------
Event: time 1396163755.172854, type 3 (EV_ABS), code 2 (ABS_Z), value -1
Event: time 1396163755.172854, -------------- SYN_REPORT ------------
Event: time 1396163755.300881, type 3 (EV_ABS), code 2 (ABS_Z), value 0
Event: time 1396163755.300881, -------------- SYN_REPORT ------------
Event: time 1396163759.061382, type 3 (EV_ABS), code 3 (ABS_RX), value 1
Event: time 1396163759.061382, -------------- SYN_REPORT ------------
Event: time 1396163759.189400, type 3 (EV_ABS), code 3 (ABS_RX), value 0
Event: time 1396163759.189400, -------------- SYN_REPORT ------------
Event: time 1396163762.485847, type 3 (EV_ABS), code 3 (ABS_RX), value -1
Event: time 1396163762.485847, -------------- SYN_REPORT ------------
Event: time 1396163762.597871, type 3 (EV_ABS), code 3 (ABS_RX), value 0
Event: time 1396163762.597871, -------------- SYN_REPORT ------------
Voila tout est fonctionnel, notre module Xin-Mo est correctement reconnu sous Linux.
Patchs des émulateurs
A cause de la particularité du module Xin-Mo, certains émulateurs ne peuvent accéder aux contrôles du joueurs 2. Il faut donc modifier leur code source.
3 émulateurs ont été patchés pour supporter le module Xin-Mo. Ces patchs sont basiques. Une fois compilé, le programme patché ne doit être utilisé qu’avec une interface Xin-Mo 2 joueurs.
Mame4all-pi
Ce premier patch permet d’étendre la détection de Mame4all-pi à 22 boutons au lieu de 16. Il est à appliqué sur les sources issues de https://code.google.com/p/mame4all-pi/

Après avoir téléchargé et décompressé le patch, on l’applique puis on compile :
pi@raspberrypi ~/temp $ git clone https://code.google.com/p/mame4all-pi/
pi@raspberrypi ~/temp $ cd mame4all-pi
pi@raspberrypi ~/temp/mame4all-pi $ patch -p1 -i mame4all-pi-xinmo.patch
patching file Makefile
patching file Makefile.debug
patching file src/inptport.cpp
patching file src/inptport.h
patching file src/input.h
patching file src/rpi/input.cpp
patching file src/rpi/minimal.h
pi@raspberrypi ~/temp/mame4all-pi $
pi@raspberrypi ~/temp/mame4all-pi $ make
Cette méthode est identique pour les 2 émulateurs suivants
piFBA
Fichier du patch :
La marche à suivre pour ce second patch est décrite dans la page https://github.com/petrockblog/Retr.... Le patch est à appliquer sur les sources issues de https://code.google.com/p/pifba/
piSnes
Fichier du patch :
Ce dernier patch se base sur la version 2 joueurs de pisnes issues de https://code.google.com/r/holgatema... (cf. http://pimame.org/forum/discussion/...)
GnGeo
GnGeo n’est pas concerné par le pb de la reconnaissance des contrôles du joueur 2. Il est assez bien écrit pour permettre une configuration fine des contrôles même dans le cas de 4 axes et 22 boutons pour le joueur 1.
Cependant, il ne permet pas le « combo » de bouton pour quitter un jeu et revenir au menu. Pour cela il faut ajouter les lignes suivantes dans le fichier src/event.c après la ligne 461 :
#if defined(GP2X) || defined(WIZ)
	if (joy_state[0][GN_HOTKEY1] && joy_state[0][GN_HOTKEY2]
	&& (joy_state[0][GN_START] || joy_state[0][GN_SELECT_COIN]))
		return 1;
#endif
devient
#if defined(GP2X) || defined(WIZ)
	if (joy_state[0][GN_HOTKEY1] && joy_state[0][GN_HOTKEY2]
	&& (joy_state[0][GN_START] || joy_state[0][GN_SELECT_COIN]))
		return 1;
#endif

	if (joy_state[0][GN_START] && joy_state[0][GN_SELECT_COIN])
		return 1;
la procédure de création de l’exécutable sur votre raspberry pi est la suivante :
$ git clone https://github.com/ymartel06/GnGeo-Pi.git
$ cd GnGeo-Pi/
$ cd gngeo/src
$ vim event.c
# edition du code source
$ cd ..
$ chmod 755 ./configure
$ ./configure --host=arm-linux --target=arm-linux
$ make
Un fois le fichier exécutable gngeo créé, il ne reste plus qu’à remplacer l’ancien par le votre.
Maintenant l’appui simultané sur « start P1 » et « Coin » provoque l’affichage du menu de gngeo.
Autre petite chose ennuyeuse dans GnGeo : dans le menu, le bouton 2 permet de selectionner et le bouton 1 d’annuler et quitter. Ce n’est pas « user friendly » puisque tous les autres émulateurs utilisent le bouton 1 pour sélectionner ou lancer. Il faut donc retoucher légèrement le code source de GnGeo :
Dans event.c à la ligne 527 on remplace
		case SDLK_ESCAPE:
			joy_state[0][GN_A]=1;
			//last=GN_A;
			//return GN_A;
			break;
		case SDLK_RETURN:
		case SDLK_KP_ENTER:
			joy_state[0][GN_B]=1;
			//last=GN_B;
			//return GN_B;
			break;
par
		case SDLK_ESCAPE:
			joy_state[0][GN_B]=1;
			//last=GN_A;
			//return GN_A;
			break;
		case SDLK_RETURN:
		case SDLK_KP_ENTER:
			joy_state[0][GN_A]=1;
			//last=GN_B;
			//return GN_B;
			break;
puis dans menu.c à la ligne 1038 on remplace :
	case GN_A:
		return MENU_CLOSE;
		break;
	case GN_B:
	case GN_C:
par
	case GN_B:
	case GN_C:
		return MENU_CLOSE;
		break;
	case GN_A:
//	case GN_C:
Il suffit de recompiler et de remplacer l’ancien exécutable par le nouveau.
Pimenu avec fond d’écran et bouton transparent
Cette version de pimenu permet de modifier l’apparence de votre écran de sélection d’émulateurs :
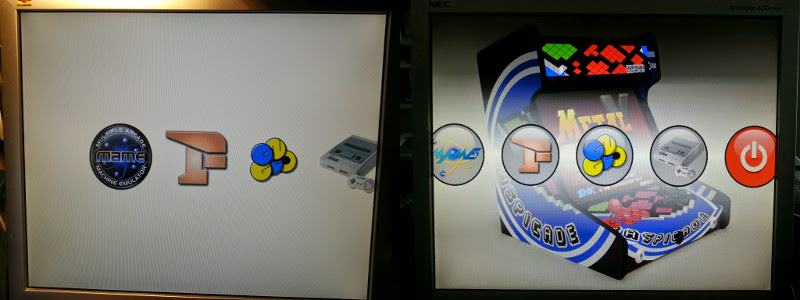
La version pour les écran avec une résolution de 640x480 minimum

la version pour la mini tv avec avec une résolution de 320x240
Release Notes
raspicade-samba-xinmo-20140517.img.gz : Modified smb.conf config file to avoid printer configuration and log error. Modification of the pimenu program to allow background image and transparent button. If you want to tune, just replace the BACKGROUND.bmp file (must be 1024x768 bmp file). You can modify the buttons too : 192x192 bmp file with black color as transparent color. A Shutdown button is added in pimenu. It stops raspicade in a clean way. If you quit pimenu with « ESC » key or « Credit » button you get a linux bash command line.
load printers = no
printing = bsd
printcap name = /dev/null
disable spoolss = yes
raspicade-samba-xinmo-20140507.img.gz : A small bug in the smb.conf config file prevent to erase files in shared subdirectories. This is due to en obsolete config directive :
security = user
replaced by :
security = user
map to guest = Bad User
Adding the following directive in all share :
read only = no
- raspicade-20140506.img.gz : Modification of gngeo source code to get it work like others emulators : Button 1 = select/run, button 2 = quit/cancel. Until now Gngeo is acting in the reverse way : button 2 = select/run and button 1 quit/cancel. It’s a bit disapointing ! So here are the modifications :
In event.c at line 527 we replace :case SDLK_ESCAPE: joy_state[0][GN_A]=1; //last=GN_A; //return GN_A; break; case SDLK_RETURN: case SDLK_KP_ENTER: joy_state[0][GN_B]=1; //last=GN_B; //return GN_B; break;with
                case SDLK_ESCAPE:
                        joy_state[0][GN_B]=1;
                        //last=GN_A;
                        //return GN_A;
                        break;
                case SDLK_RETURN:
                case SDLK_KP_ENTER:
                        joy_state[0][GN_A]=1;
                        //last=GN_B;
                        //return GN_B;
                        break;
And in menu.c at line 1038 we replace :
        case GN_A:
                return MENU_CLOSE;
                break;
        case GN_B:
        case GN_C:
by
        case GN_B:
        case GN_C:
                return MENU_CLOSE;
                break;
        case GN_A:
//        case GN_C:
And here we are... let’s compile and run... Wonderful.
- raspicade-20140504.img.gz : Modification of gngeo source code to make « Start Player 1 + Coins » buttons display gngeo menu, like in other emulators. Modification of the event.c file at line 461. Adding the following lines :
    if (joy_state[0][GN_START] && joy_state[0][GN_SELECT_COIN])
    return 1;
Update of the /home/pi/.gngeo/gngeorc file to avoid menu with the player 1 button 6 (MENU=J0B5)
p1control A=J0B0,B=J0B1,C=J0B2,D=J0B3,START=J0B6,UP=J0a1,DOWN=J0a1,LEFT=J0A0,RIGHT=J0A0,COIN=J0B7 p2control A=J0B10,B=J0B11,C=J0B12,D=J1B13,START=J0B16,UP=J0a3,DOWN=J0a3,LEFT=J0A2,RIGHT=J0A2 - raspicade-20140503.img.gz : All emulators are now configured with scanline mode. The visual effect approach the original arcade systems :
gngeorc
fullscreen true
blitter soft
effect scanline50
mame
display_smooth_stretch=no
display_border=0
display_effect=1
pifba
[Graphics]
DisplaySmoothStretch=0
DisplayEffect=1
pisnes
[Graphics]
DisplaySmoothStretch=0
DisplayEffect=1- raspicade-20140502.img.gz : Support of wifi (see french manual for configuration = just need to put SSID and Key in wpa_supplicant.conf) with WPA/WPA2 mode. Adding the ralink-firmare to support the pihut wifi key
- raspicade-samba-xinmo-20140425.img.gz : The distribution contains 2 series of emulators executables and config files : one for standard gamepads (same as previous versions), and one for specific xin-mo module (I integrated severals patches to allow 2 players support for this module. The last one is here http://pimame.org/forum/discussion/.... By default the standard gamepads settings are running. To get raspicade working with your Xin-Mo module, you only need to copy executables and config file over the standard one : cp snesx-xinmo-2players snesx ; cp snesx.cfg-xinmo-2players snesx.cfg... and so on.
- raspicade-samba-xinmo-20140416.img.gz : Some bug fixes for gngeorc file. Integration of the 2 players version of pisnes from https://code.google.com/r/holgatema.... Works well with 2 gamepads. Integration of my own mame4all-pi patch which allows to configure the 22 buttons of the xin-mo modules (see https://github.com/petrockblog/Retr...).
- smallcade-xinmo-20140331.img.gz : A new starting video. Possibility to create files (allow avoiding the net and audio configuration) via samba (ie from Windows). Files are now named « no_audioconf_at_boot » and « no_netconf_at_boot » without the starting « . ».
XinMo Arcade (http://www.xin-mo.com/?page_id=34) module support integrated to raspicade despite a serious bug in recent kernels (see https://bugs.launchpad.net/ubuntu/+...) : many thanks to http://ithink.ch/blog/2013/09/08/pa...
Proof of concept :
pi@raspberrypi ~ $ uname -a
Linux raspberrypi 3.10.34 #1 PREEMPT Sun Mar 30 05:08:49 UTC 2014 armv6l GNU/Linux
pi@raspberrypi ~ $

[  285.035573] usb 1-1.3.2: new low-speed USB device number 8 using dwc_otg
[  285.145233] usb 1-1.3.2: New USB device found, idVendor=16c0, idProduct=05e1
[  285.145298] usb 1-1.3.2: New USB device strings: Mfr=1, Product=2, SerialNumber=0
[  285.145320] usb 1-1.3.2: Product: THT Arcade console 2P USB Player
[  285.145336] usb 1-1.3.2: Manufacturer: THT
[  285.214536] input: THT THT Arcade console 2P USB Player as /devices/platform/bcm2708_usb/usb1/1-1/1-1.3/1-1.3.2/1-1.3.2:1.0/input/input3
[  285.216642] xinmo 0003:16C0:05E1.0004: input,hidraw3: USB HID v1.01 Joystick [THT THT Arcade console 2P USB Player] on usb-bcm2708_usb-1.3.2/input0

Properties:
Testing ... (interrupt to exit)
Event: time 1396163394.891907, type 3 (EV_ABS), code 0 (ABS_X), value 1
Event: time 1396163394.891907, -------------- SYN_REPORT ------------
Event: time 1396163395.035925, type 3 (EV_ABS), code 0 (ABS_X), value 0
Event: time 1396163395.035925, -------------- SYN_REPORT ------------
Event: time 1396163401.148755, type 3 (EV_ABS), code 0 (ABS_X), value -1
Event: time 1396163401.148755, -------------- SYN_REPORT ------------
Event: time 1396163401.340781, type 3 (EV_ABS), code 0 (ABS_X), value 0
Event: time 1396163401.340781, -------------- SYN_REPORT ------------
Event: time 1396163431.008814, type 3 (EV_ABS), code 1 (ABS_Y), value 1
Event: time 1396163431.008814, -------------- SYN_REPORT ------------
Event: time 1396163431.152831, type 3 (EV_ABS), code 1 (ABS_Y), value 0
Event: time 1396163431.152831, -------------- SYN_REPORT ------------
Event: time 1396163436.033493, type 3 (EV_ABS), code 1 (ABS_Y), value -1
Event: time 1396163436.033493, -------------- SYN_REPORT ------------
Event: time 1396163436.193522, type 3 (EV_ABS), code 1 (ABS_Y), value 0
Event: time 1396163436.193522, -------------- SYN_REPORT ------------
- raspicade-samba-20140325.img.gz : Scripting of the selection of audio output at the very first boot : It may be interesting if you use a hdmi-vga converter (instead of hdmi alone). If the HDMI port is connected, the sound is routed by default through it. The script allows to configure the Jack 3"5 output. The script is running in this way :
- During the first boot, the script tests if the /var/lib/alsa/asound.state exists. It provides and stores the alsa configuration. We need to modify this file, because at boot, modules and alsatools are not loaded, and we cannot use a simple amixer command like « /usr/bin/amixer cset numid=3 0/1/2 ».
- it asks the user to configure audio output (y/n).
- if the answer is « y », the script asks to the user to choose the output : (0 = auto, 1 = jack3,5, 2 = hdmi). For non US user, be careful the keyboard is Qwerty... Please use the numpad ![]() . Another warning : backspace key and numpas return are not fonctionning correctly. If you do wrong, consider t hit CTRL-C keys and reboot the system to make another configuration.
. Another warning : backspace key and numpas return are not fonctionning correctly. If you do wrong, consider t hit CTRL-C keys and reboot the system to make another configuration.
- After filling the variables, the script modifies the /var/lib/alsa/asound.state file with the new values and the selected sound output will be used for this first boot.
- If the answer is « n », the boot continues normally, using the previous configuration. At the next reboot, the sound configuration question will be displayed again. To avoid configuration permanently, just create the empty hidden file ”/home/pi/.no_audioconf_at_boot” (you can use the « touch » command : “touch .no_audioconf_at_boot”). The script tests if the file exists to ask or not for the configuration.
- raspicade-samba-20140324.img.gz : Scripting of IP static configuration for eth0 for the very first boot : It may be interesting to fix the eth0 IP adress for raspicade during the first boot. You don’t need to serach for the dhcp delivered IP adress. It becomes more easy to connect via SSH or upload roms by ftp. The script is running in this way :
- During the first boot, the script tests if the /etc/network/interfaces file is using dhcp configuration (default case)
- it asks the user to configure a fixed IP (y/n).
- if the answer is « y », the script asks to the user to fill some variables : IP address, Network mask and Gataway (Ex : ip addr : 192.168.1.50, netmask 255.255.255.0 gateway :192.168.1.1). For non US user, be careful the keyboard is Qwerty... Please use the numpad ![]() . Another warning : backspace key is not fonctionning correctly. If you do wrong, consider t hit CTRL-C keys and reboot the system to make another configuration.
. Another warning : backspace key is not fonctionning correctly. If you do wrong, consider t hit CTRL-C keys and reboot the system to make another configuration.
- After filling the variables, the script modifies the /etc/network/interfaces file with the new values and the fixed IP will be used for this first boot. At the next reboot, the script will only read ans displey the static configuration you use, before displaying the waiting video.
- If the answer is « n », the boot continues normally, using the DHCP configuration system. At the next reboot, the static configuration question will be displayed again. To avoid configuration permanently, just create the empty hidden file ”/home/pi/.no_netconf_at_boot” (you can use the « touch » command : “touch .no_netconf_at_boot”). The script tests if the file exists to ask or not for the configuration.
- to come back to dhcp configuration, you need to edit as root the /etc/network/interfaces file and replace
iface eth0 inet static
 address 192.168.1.50
 netmask 255.255.255.0
 gateway 192.168.1.1
by
iface eth0 inet dhcp- raspicade-samba-20140321.img.gz : Samba/CIFS added to allow Windows users to uploads easily roms on raspicade. If you don’t need samba (ssh and ftp is enough for you) you can use raspicade-2014-03-03.img.gz.
- raspicade-2014-03-03.img.gz : New splash video with sound. Music from jamendo : Artist Ozzed http://www.jamendo.com/fr/track/361.... Add a splash out picture when raspicade halts.
- raspicade-20140228.img.gz : add a splash video a screen during boot up. Use of omxplayer. Add de « quiet » mode in cmdline.txt
- raspicade-20140216.img.gz : add a splash screen during boot up. Use of fbi package which is quick and simple.
- raspicade-20140206.img.gz : add the piFBA emulator. It can replace AdvMame and GnGeo.
- raspicade-20140124.img.gz : Halt system properly by pressing button 6 in pimenu
- raspicade-20140121.img.gz : console-data package added to allow « loadkeys » utility. Minor change in mame.cfg (mam4allpi)
- raspicade-20140110.img.gz : update the retrogame program (small bugs fixed)
- raspicade-20140103.img.gz : Advancemame and GnGeo emulators added
- raspicade-20131223.img.gz : initial version : contains Mame4all-pi, pi-SNES9x and pcsx_rearmed. It starts automatically on Pimenu allowing the choice of the emulator.