Version Française |
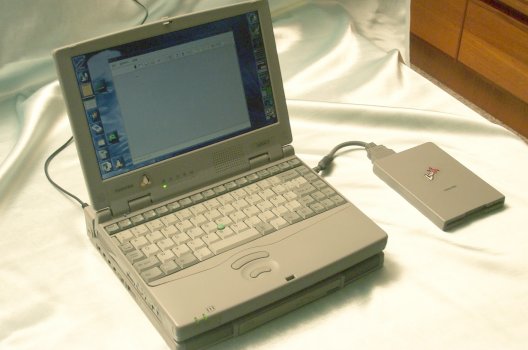
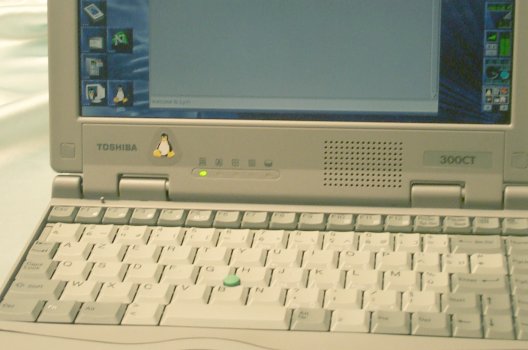
Install Suse 6.3 on a Toshiba Portégé 300ct Laptop |
|
|
This laptop use a Intel Pentium 133Mhz (2.5v/3.3v) with MMX technologie, with integrated math copro. The external bus speedis 66Mhz.
It has 32Mo ram on board at, which can be extended to 64Mo.
It's a 16/9 active matrix screen, with a 10"4 diagonal. Pitch is 0.22mm. It allows a maximal resolution of 1024x600.
The video card has 2Mo of DRAM and based on B65554 de Chips & Technologie graphic chip. One can plug an external screen on the laptop. The different resolution are :
The hard disk has a capacity of 1.5 Go with an access time of 13/14ms.
It has an external floppy drive, which is plugged on the dock station (which has the cdrom drive). Its capacity is 1.44 Mo.
It is inserted in th dock station. Its charactertistics are 10x spped and an access time of 180ms. It can read different types of cdrom : CD-DA, CD-ROM, CD-ROM XA, CD-Bridge (Photo-CD, Video-CD), CD-I, CD-I Ready, CD-G, Multisession (Photo-CD, CD-Plus).
It's a 84 key keyboard with 12 specific keys. The numerical keypas is integrated in the keyboard as the cursor moving keys.
The mouse is an integrated Accupoint. One can plug a serial mouse on the PS/2 dock station connector. But this connector seems to be fragile.
This laptop has two PCMCIA Slot for CardBus and ZV Card Ready. Slot 16 bits/5.0 volts, Slot 32 bits/3.3 volts.
It is made by an internal battery Li-Ion (10.8V, 2400MAh), which has 2 hours autonomy. The charge time is 4 hours when the laptop is shutdown, and can be 11 hours when the laptop is running.
An AC adaptator (PA2240U) is also available. It takes 100-240V in input (50-60Hz) and gives a 15v DC at 2A.
It's a 33.6/14.4 Kbps modem which can do fax. The protocols supported are the following : Bell-103/212A, CCITT-V.21/V.22, V.32, V.32bis, V.34, V.80. It behave as a classe 1 fax and support the following protocols : V.21 ch2, V.27 ter, V.29, V.17. The following functions are supported : phone, answer, boot when reception of a message, calls filtering and caller autentification.
The used chipset is an YAMAHA OPL3-SA3. It can play and record 16 bits stereo sound. The maximal sampling frequency is 48Khz. The FM Synthesis is also support. The car is also full duplex and Direct Sound, Direct 3D compatible. It is Sound Blaster Pro, MIDI and Wav compatible.
This part is for whese who want to keep Windows on their laptop for some justified reasons (I'm not an integrist, and I can understand that you may need a software which is only available on this OS, your girlfriend doesn't like pinguins when she has a letter to type or you need your laptop to make a presentation ... under powerpoint...).
So, you need windows and linux at the same time on a 1.5 Go hard drive, which is short. On my laptop, I keep 550Mo for Windows. A minimum install, with pack office takes 200 to 250 Mo, which keep space for your data.
Consequently, 1Go is leaving for your prefered OS. I know, it is quite short if you want to developp, but for writing a thesis with LYX and LATEX (in my case), it is good.
So we start from this configuration. You have 1Go top fill with linux data. Don't worry it will be quick.
In a first time, you should make a complete save of your data. For instance, windows has the whole disk. If you have luck (or money), you have Partition Magic software, and you can repartition your hard drive without reinstall windows and your data. You can use ???, which is free and on the linux install cd. But in the two case you need to have 1Go free (so you have to erase these stupid games ;-)), to defrag the disk, and after that doing your repartionning.
In my case, I restart from scratch, because a windows reinstall, is always a good idea, to make it as stable as possible, with all these f*****g dll files. I will describe this option in the following. I'm in the case of using Windows95 (there is no difference with Windows98, for Windows 3.11 you will need your install floppies ;-)).
Firstly, we are going to make partitions on the hard drive, and install windows. Take your most beautiful starting floppy (or the install floppy of windows), or the first floppy of the DOS install (in the case of windows 3.11). Insert it in the drive and start the computer (don't forget to plug the drive on the dock station ;-)). You can start from the Windows install cdrom, and stop the install to get a DOS screen and make the following command.
When your computer is started, don't start the install, quit the procedure, and launch fdisk. This program allows us to split our hard drive in two parts. At this time, you should verify that you have saves of your datas for the last time. At the end of this procedure, the hard drive will free of data. (All your previous data will be lost, without chance to recover them).
In this part, I consider that you know how to use fdisk. In a fisrt time, we suppress the previous partition where Windows was installed (Erase the main MS-DOS partition). After that, you need to create a main DOS partition which does not take the whole disk. You fix the size of this part to 550Mo. We stop here with fdisk, we will create the linux partition with the linux fdisk. You have to restart the computer to take into account this new partitionning.
Keep the install disk in the drive, and let the Windows (or DOS) install procedure go. I will not give details on this instalI. I consider that all go well to the final install reboot, and you have Windows installed on the 550Mo partition.
So, we have a laptop with Windows on it (Whouahou, super for an article on linux... to sum-up : to install Linux, install Windows first ;-)), and a 1Go free space, not for a long time.
I didn't try to boot from the linux cdrom, but it is possible to install in this way. In fact it possible to choose the boot sequence by configuring the BIOS (floppy ® cd-rom ® hard disk) (press the escape key during the boot and after press the F1 key). Another tips to boot from the wanted device is to press : f to boot from the floppy, h to boot from the hard drive and c to boot from the cd-rom. In fact you have the choice.
In order to create the starting floppy, go in the dosutils directory of the suse linux cd. Thanks to the programm rawrite you can create yout booting disk by choosing the image file. Choose the laptop boot image, specially done for laptop ;-) in the directory disks.
In order to create this floppy, put the suse cdrom in the drive (you're under wndows now). Launch a DOS session, and go in the following directory d:\cdrom\dosutils\rawrite\ and launch rawrite.exe. Put a blank floppy in the drive and choos the right image file laptop by typing ..\..\disks\laptop and return. You have now something which is quite similar to the figure 2.
Let your floppy in the drive, and reboot your computer. Without doing something, your laptop boots on, the floppy. Here it is, you're on the good side of the force, you're ready to install linux on your computer.
Linux start alone from the floppy. After dectecting the different components of the hardware like the hard drive, CD-Rom, floppy and so on,... the real installing phase starts. Normally, this install is in text mode with the laptop image. If you choose the yast2 image you should have a graphical install screen. Without knowing if the graphic card will be detected, i prefered install in text mode.
After choosing the language, the keyboard configuration, you choos the install mode. At this time don't let the installation script make the install alone, sometimes it takes all the hard drive to make its install, and it erases all data on the disk. Choose to install linux on the rest of the disk (1Go). In this 1Go partition, i recommand to create a swap part which its size is the double of your ram amount (64Mo swap for 32Mo ram). Then you can keep the rest for the / part (root), or split this free space in / (root) et /home (your data). This is your choice.
Then the install script will format the swap part and the ext2 parts. Then the system ask you for choosing the packages to be installed. Make your choice according to your needs, avoiding unuseful things, because the left space will be quickly filled. Finally you can launch the install.
It is now the moment for registering your software :-)... oops, I think, I've installed too much commercial software... in fact one coffe or two should be sufficient.
When the copy of the packages is achieved, the install must be finished : configuring LILO, next root password, creation of a standard user (highly recommended), network configuration if you have one. We'll be back ;-), on the LILO configuration, as password as concerned, choose something only kown by you.
LILO allows to start according your choice : linux or windows. Even OS/2 if it is installed on your system.
LILO can be install, on the boot sector of your hard disk (MBR) or at the beginning of a partition.
If you're frightened to make a mistake, you can install LILO on a floppy, and when you want to start linux, just insert the floppy in the drive and boot the computer. Figure 2 give the configuration window of LILO.
Figures 4, 5 and 6, show the configuration for booting windows, linux or another linux (kernel test for exemple).
The différent fields to be filled are the following :
At this time the install script ask you to choose the booting kernel. You should use the Pentium optimized one, or the laptop one.
The system is going to restart and linux is now installed on your system.
In the following part, we'll see how to configure the graphic X server and the sound card of this computer.
Sax allows you to configure graphically your X server. Log as root and launch sax. The X server is going to detect your graphic card in order to switch in the graphique mode. After about 15 seconds, you have a graphique window in the top left corner of your screen in 640x480 format. Not so bad for instance.
The configuration starts now.
After loading severals configuration parameters, you get a window made of severals "onglets". The first one is about the keyboard and mouse configuration.
In the pilot item, choose PS/2 protocol. For the device file choose /dev/psaux.
In the property item, fix the sampling rate to 60 and the third bouton simulation speed to 200. These parameters are a good deal.
In the options item, check the "Simulate 3 buttons" case and choose a 1200 bauds rate. Don't select any flags.
You can now test your new parameters after applying them.
In the model item, choose the Generic 102-keys-Intl keyboard with the english language. No configuration has to be made in the expert mode.
In the Constructor and Model item, choose Auto Detected--. Then choose the expert mode, and select the ct65554 graphique chip.
Now we can continue with the monitor configuration.
In the type item, select LCD Hsync 31.5-50KHz Vsync 58-62KHz Type LCD.
In the model item, select Panoramique SVGA 1024x600@76Hz.
In the color item, choose 16 bits [655356]. In order to access to the specific resolution of 1024x600, you have to choose the expert mode. In the special item, add the desired resolution : 1024x600, click on the add button, and choose the sure method. Quit the expert mode, and select the new resolution. Then click on the continue button, in order to test this new configuration.
At this time, a new X server is started with this new configuration. If everything is ok, you'll see a beautiful violet screen in 1024x600, now, just save this configuration and quit SaX.
Here is my XF86Config file for information.
Section "Files"
RgbPath "/usr/X11R6/lib/X11/rgb"
FontPath "/usr/X11R6/lib/X11/fonts/75dpi:unscaled"
FontPath "/usr/X11R6/lib/X11/fonts/100dpi:unscaled"
FontPath "/usr/X11R6/lib/X11/fonts/Type1"
FontPath "/usr/X11R6/lib/X11/fonts/URW"
FontPath "/usr/X11R6/lib/X11/fonts/Speedo"
FontPath "/usr/X11R6/lib/X11/fonts/misc"
FontPath "/usr/X11R6/lib/X11/fonts/75dpi"
FontPath "/usr/X11R6/lib/X11/fonts/100dpi"
EndSection
Section "ServerFlags"
AllowMouseOpenFail
EndSection
Section "Module"
EndSection
# This section is no longer supported
# See a template below
# Section "XInput"
# EndSection
Section "Keyboard"
Protocol "Standard"
XkbRules "xfree86"
XkbModel "pc102"
XkbLayout "fr"
EndSection
Section "Pointer"
Protocol "PS/2"
Device "/dev/psaux"
SampleRate 60
Emulate3Buttons
Emulate3Timeout 201
BaudRate 1200
EndSection
Section "Monitor"
Identifier "Primary-Monitor"
VendorName "!!! LCD !!!"
ModelName "PANORAMIC SVGA 1024X600@76HZ"
HorizSync 31.5-50
VertRefresh 58-62
Modeline "1152x864" 49.97 1152 1168 1384 1496 864 864 869 902
Modeline "800x600" 40.35 800 816 928 1040 600 600 606 626
Modeline "1024x600" 49.93 1024 1040 1216 1328 600 600 605 626
Modeline "1600x1000" 49.92 1600 1616 1968 2080 1000 1000 1003 1044
Modeline "1280x960" 49.92 1280 1296 1552 1664 960 960 964 1003
Modeline "1024x768" 49.93 1024 1040 1216 1328 768 768 773 802
Modeline "640x480" 25.79 640 656 720 832 480 480 484 501
Modeline "1600x1200" 49.92 1600 1616 1968 2080 1200 1200 1203 1253
Modeline "1280x1024" 49.92 1280 1296 1552 1664 1024 1024 1028 1070
EndSection
Section "Device"
Identifier "Primary-Card"
VendorName "---AUTO DETECTED---"
BoardName "---AUTO DETECTED---"
Chipset "ct65554"
EndSection
Section "Screen"
Driver "SVGA"
Device "Primary-Card"
Monitor "Primary-Monitor"
DefaultColorDepth 16
SubSection "Display"
Depth 32
Modes "640x480"
EndSubSection
SubSection "Display"
Depth 24
Modes "640x480"
EndSubSection
SubSection "Display"
Depth 16
Modes "1024x600"
Virtual 1024 600
EndSubSection
SubSection "Display"
Depth 8
Modes "640x480"
EndSubSection
EndSection
Section "Screen"
Driver "Accel"
Device "Primary-Card"
Monitor "Primary-Monitor"
DefaultColorDepth 16
SubSection "Display"
Depth 32
Modes "640x480"
EndSubSection
SubSection "Display"
Depth 24
Modes "640x480"
EndSubSection
SubSection "Display"
Depth 16
Modes "1024x600"
Virtual 1024 600
EndSubSection
SubSection "Display"
Depth 8
Modes "640x480"
EndSubSection
EndSection
To configure the sound card, you don't need to recompile your kernel (really no need, because I tried and I didn't success). In fact, we are going to use the program from the alsa package (Advanced Linux Sound Architecture). All is available on the suse web site http://www.suse.com in the directory snd1 from the commercial version (it is absent from the evaluation cd), or on the following web site http://www.alsa-project.org in the rpm format. In my case, I used the alsa-0.4.1d-14 release.
To install this package, log as root, and type rpm -ivh alsa-0.4.1d-14 or use kpackage if you prefer KDE.
When the package is installed, just start alsaconf. In a first time, this program allows you to configure your sound card. We'll see that an automatic configuration via alsaconf doesn't work. We'll have to modified the module configuration file by hand.
The second window ask you the type of your sound card to configure. Choose the Yamaha OPL2-SA2/SA3 card as shown in the following window.
Then, the next screen is used to define the card identificator, you can leave CARD_1. But you can name it as you want.
You need to fill the base E/S adress of the card, by default on your laptop, the card has the adress 0x370. Fill the field and go next.
Now we configure the windows sound support adress (Windows Sound System WSS) which is 0x530.
Then the MIDI port adress 0x330, and the FM port adress 0x388.
We must configure the IRQ : IRQ 5. Then it is the DMA's turn. DMA1 port is 1 with a sizeof 64, and DMA2 port is 0 with a size of 64 également.
Here is a table which sums up the configuration parameters :
| Name | Variable | Value |
| Card | Yamaha OPL3-SA2/SA3 | NA |
| ID Card | snd_id | CARD_1 |
| Input/output Adress | snd_port | 0x370 |
| Sound Blaster Adress | snd_sb_port | 0x220 |
| Windows Sound System Adress | snd_wss_port | 0x530 |
| MIDI Adress | snd_midi_port | 0x330 |
| FM Synthesis Adress | snd_fm_port | 0x388 |
| IRQ Number | snd_irq | 5 |
| DMA 1 Adress | snd_dma1 | 1 |
| DMA 1 Size | snd_dma1_size | 64 |
| DMA 2 Adress | snd_dma2 | 0 |
| DMA 2 Size | snd_dma2_size | 64 |
| PNP Support | snd_isapnp | 0 |
At the end of the configuration, the script will start rcalsasound start in order to initialise the modules. Unfortunately, it doesn't work with our laptop. The initialisation will fail with the following error "device buzy".
It comes from two things :
By default alsaconf append its modules configuration to the file. You should have something like that :
# --- ALSACONF verion 0.4.2 ---
alias char-major-116 snd
alias snd-card-0 snd-card-opl3sa2
alias char-major-14 soundcore
alias sound-slot-0 snd-card-0
alias sound-service-0-0 snd-mixer-oss
alias sound-service-0-1 snd-seq-oss
alias sound-service-0-3 snd-pcm1-oss
alias sound-service-0-12 snd-pcm1-oss
options snd snd_major=116 snd_cards_limit=1
options snd-card-opl3sa2 snd_index=1 snd_id=CARD_1 snd_port=0x370
# --- END: Generated by ALSACONF, do not edit. ---
Now, you can restart the modules with the commande rcalsasound start, if everything is ok, you get no error messages. You can verify that the module are running with lsmod.
You can try to play a sound with the following commande :
aplay /usr/share/sounds/alsa/whistle.au
If you hear nothing, it is not really a problem. In fact by default, the mixer inputs are not initialized and are perhaps all equal to zero.
I don't know if there exists a mixer configuration utility in console mode ( use amixer or edit the asound.conf ), so launch X and start gamix or xamixer2. You can now configure the inpus and outputs of your card. You can now try to play the whistle.au file. Normally, everything is now ok, and youhave sound on your small computer.
Here is my /etc/modules.conf file.
# Aliases - specify your hardware
alias eth0 off
alias scsi_hostadapter off
# only used for Mylex or Compaq Raid as module
alias block-major-48 off
alias block-major-49 off
alias block-major-72 off
alias block-major-73 off
# only needed for fifth and sixth IDE adaptor
alias block-major-56 off
alias block-major-57 off
# mouse (for older busmice)
alias char-major-10 psaux
alias parport_lowlevel parport_pc
options parport_pc io=0x378 irq=none,none
# If you have multiple parallel ports, specify them this way:
# options parport_pc io=0x378,0x278 irq=none,none
# For parallel port devices, uncomment the following two lines and change
# "frpw" to the protocol type you use
# post-install paride insmod frpw
# pre-remove paride rmmod frpw
#*****************************************************************************
# If you want to use the kernel sound drivers instead of OSS 3.8.1z (the
# recommended solution) please put comment signs in front of the following
# entries. Then choose one of the sample configurations below. Uncomment all
# lines starting with 'alias', 'options' or 'pre-/post-install' within one
# such configuration and modify the parameters according to your needs (e.g.
# the ressources chosen for this device in /etc/isapnp.conf). For a lot of
# ISA soundcards the Soundblaster driver is a good starting point.
#*****************************************************************************
alias char-major-14 off
alias sound off
alias midi off
#*****************************************************************************
# module : ad1816.o AD1816 chip
#
# Supported cards :
#
# Terratec Base 1/64
# HP Kayak
# Acer FX-3D
# SY-1816
# Highscreen Sound-Boostar 32 Wave 3D
# Highscreen Sound-Boostar 16
#
# Documentation available in /usr/src/linux/Documentation/sound/AD1816
# and in /usr/src/linux/drivers/sound/ad1816.c .
#
# Possible configuration :
#
# alias char-major-14 ad1816
# post-install ad1816 modprobe "-k" opl3
# post-install ad1816 modprobe "-k" mpu401
# options ad1816 io=0x530 irq=5 dma=1 dma2=3 ad1816_clockfreq=33000
# options opl3 io=0x0388
# options mpu401 io=0x0330 irq=9
#
#*****************************************************************************
# module : ad1848.o AD1848/CS4231/CS4248 Chip
# --> Windows Sound System (MSS/WSS)
#
# A variety of common ISA soundcards are
# compatible with this family of chips.
#
# Documentation available in /usr/src/linux/drivers/sound/ad1848.c (search
# for MODULE_PARM) and in /usr/src/linux/Documentation/sound/README.OSS .
# Usually this module is used in conjunction with other higher level sound
# modules.
#
# Possible configuration for stand-alone usage :
#
# alias char-major-14 ad1848
# options ad1848 io=0x530 irq=7 dma=0 dma2=3
#
#*****************************************************************************
# module : cs4232.o Crystal 423x chipsets
#
# Documentation available in /usr/src/linux/drivers/sound/cs4232.c (search
# for MODULE_PARM) and in /usr/src/linux/Documentation/sound/CS4232 . This
# chip is often used together with other sound hardware.
#
# Possible configuration for stand-alone usage :
#
# alias char-major-14 cs4232
# post-install cs4232 modprobe "-k" opl3
# options cs4232 io=0x534 irq=5 dma=1 dma2=0 mpuio=0x330 mpuirq=9
# options opl3 io=0x388
#
#*****************************************************************************
# module : es1370.o Ensoniq 1370 Chipsatz (--> PCI64/128)
#
# Supported cards :
#
# Creative Labs PCI64/128
#
# Documentation availabke at /usr/src/linux/Documentation/sound/es1370 and
# /usr/src/linux/drivers/sound/es1370.c .
#
# alias char-major-14 es1370
# options es1370 joystick=1
#
#*****************************************************************************
# module : es1371.o Creative Ensoniq 1371 Chipsatz (--> PCI64/128)
#
# Supported cards :
#
# Creative Labs PCI64/128
#
# Documentation availabke at /usr/src/linux/Documentation/sound/es1371 and
# /usr/src/linux/drivers/sound/es1371.c .
#
# alias char-major-14 es1371
# options es1371 joystick=0x200
#
#*****************************************************************************
# module : mad16.o MAD16
#
# Possible configuration :
#
# alias char-major-14 mad16
# options sb mad16=1
# options mad16 io=0x530 irq=7 dma=0 dma16=1
#
#*****************************************************************************
# module : sb.o Soundblaster 16, SB Pro + Clones
# Also needed for AWE32/64
#
# Dcoumentation available in /usr/src/linux/Documentation/sound/Soundblaster
# and in /usr/src/linux/drivers/sound/sb.c .
#
# Possible configuration :
#
# alias char-major-14 sb
# post-install sb /sbin/modprobe "-k" "adlib_card"
# options sb io=0x220 irq=7 dma=1 dma16=5 mpu_io=0x330
# options adlib_card io=0x388
#
#*****************************************************************************
# module : trix.o MediaTrix AudioTrix Pro
#
# alias char-major-14 trix
# pre-install trix modprobe "-k"
#
#*****************************************************************************
# module : wavefront.o Turtle Beach Maui, Tropez, Tropez Plus
#
# Comment from /usr/src/linux/Documentation/sound/Wavefront :
# (please read that file !)
# "the wavefront options "io" and "irq" ***MUST*** match the "synthio"
# and "synthirq" cs4232 options."
# Possible configuration :
#
# alias char-major-14 wavefront
# alias synth0 wavefront
# alias mixer0 cs4232
# alias audio0 cs4232
# pre-install wavefront modprobe "-k" "cs4232"
# post-install wavefront modprobe "-k" "opl3"
# options wavefront io=0x200 irq=9
# options cs4232 synthirq=9 synthio=0x200 io=0x530 irq=5 dma=1 dma2=0
# options opl3 io=0x388
#
#*****************************************************************************
# Example config for two ALSA sound drivers (ess1938 and ens1370)
# SEE /usr/doc/packages/alsa/INSTALL
# There you will also find examples for more complex configs with isapnp ...
#*****************************************************************************
# module : snd-card-es1938 ALSA: ESS Solo 1
# module : snd-card-ens1370 ALSA: Ensoniq 1370 (SB PCI 64)
#
## Base config
# alias char-major-116 snd
# options snd snd_major=116 snd_cards_limit=2
# alias char-major-14 soundcore
## Cards
# alias snd-card-0 snd-card-es1938
# alias snd-card-1 snd-card-ens1370
## OSS/Lite compat
# alias snd-slot-0 snd-card-0
# alias snd-slot-1 snd-card-1
## OSS services of ALSA
# alias sound-service-0-0 snd-mixer-oss
# alias sound-service-0-1 snd-seq-oss
# alias sound-service-0-3 snd-pcm1-oss
# alias sound-service-0-12 snd-pcm1-oss
# alias sound-service-1-0 snd-mixer-oss
# alias sound-service-1-1 snd-seq-oss
# alias sound-service-1-3 snd-pcm1-oss
# alias sound-service-1-12 snd-pcm1-oss
## Set mixer to stored defaults (with alsactl store)
# post-install snd alsactl restore
#
#*****************************************************************************
########################################################################
# Options; these are examples; uncommented and modify the lines you need
########################################################################
# options cdu31a cdu31a_port=0x340 cdu31a_irq=0
# options sbpcd sbpcd=0x230,1
# options aztcd aztcd=0x320
# options cm206 cm206=0x340,11
# options gscd gscd=0x340
# options mcd mcd=0x300,11
# options mcdx mcdx=0x300,11
# options optcd optcd=0x340
# options sjcd sjcd_base=0x340
# options sonycd535 sonycd535=0x340
# options isp16 isp16_cdrom_base=0x340 isp16_cdrom_irq=0
# options ne io=0x300 irq=5
# Use this if you have two cards:
# options ne io=0x300,0x320 irq=5,7
# options tulip options=0
# options 3c59x options=0
# options 3c501 io=0x280 irq=5
# options 3c503 io=0x280 irq=5 xcvr=0
# options 3c505 io=0x300 irq=10
# options 3c507 io=0x300 irq=10
# options 3c509 irq=10
# options at1700 io=0x260 irq=10
# options smc-ultra io=0x200 irq=10
# options wd io=0x300 irq=10
# options smc9194 io=0x200 irq=10 ifport=0
# options e2100 io=0x300 irq=10 mem=0xd0000 xcvr=0
# options depca io=0x200 irq=7
# options ewrk3 io=0x300 irq=10
# options eexpress io=0x300 irq=10
# options hp-plus io=0x300 irq=10
# options hp io=0x300 irq=10
# options hp100 hp100_port=0x380
# options apricot io=0x300 irq=10
# options ac3200 io=0x300 irq=10 mem=0xd0000
# options de620 io=0x378 irq=7 bnc=1
# options ibmtr io=0xa20
# options arcnet io=0x300 irq=10 shmem=0xd0000
# options plip io=0x378 irq=7
# options eepro io=0x260 irq=10 mem=0x6000
# options eth16i io=0x2a0 irq=10
# options fmv18x io=0x220 irq=10
# options ni52 io=0x360 irq=9 memstart=0xd0000 memend=0xd4000
# options bttv card=2
# options tuner type=7
options dummy0 -o dummy0
options dummy1 -o dummy1
alias block-major-1 rd
alias block-major-2 floppy
alias block-major-3 off
alias block-major-7 loop
alias block-major-8 sd_mod
alias block-major-11 sr_mod
alias block-major-13 xd
alias block-major-15 cdu31a
alias block-major-16 gscd
alias block-major-17 optcd
alias block-major-18 sjcd
alias block-major-20 mcdx
alias block-major-22 off
alias block-major-23 mcd
alias block-major-24 sonycd535
alias block-major-25 sbpcd
alias block-major-26 sbpcd
alias block-major-27 sbpcd
alias block-major-28 sbpcd
alias block-major-29 aztcd
alias block-major-32 cm206
alias block-major-33 off
alias block-major-34 off
# network block device
alias block-major-43 off
alias block-major-45 pd
alias block-major-46 pcd
alias block-major-47 pf
alias char-major-4 serial
alias char-major-5 serial
alias char-major-6 lp
alias char-major-9 st
alias char-major-10-135 off
alias char-major-15 off
alias char-major-19 cyclades
alias char-major-20 cyclades
alias char-major-21 sg
alias char-major-27 ftape
alias char-major-30 iBCS
alias char-major-36 netlink_dev
alias char-major-43 hisax
alias char-major-44 hisax
alias char-major-45 hisax
alias char-major-48 riscom8
alias char-major-49 riscom8
alias char-major-75 specialix
alias char-major-76 specialix
alias char-major-81 bttv
alias char-major-96 pt
alias char-major-97 pg
alias char-major-107 3dfx
alias char-major-109 lvm
# IrDA
alias char-major-161 ircomm-tty
# USB
alias char-major-166 acm
#alias char-major-180 usbcore
alias char-major-240 usb-serial
alias binfmt-332 iBCS
alias binfmt-518 iBCS
alias binfmt-204 binfmt_aout
alias binfmt-263 binfmt_aout
alias binfmt-264 binfmt_aout
alias binfmt-267 binfmt_aout
alias binfmt-0064 binfmt_aout
alias iso9660 isofs
alias tty-ldisc-1 slip
alias tty-ldisc-3 ppp
alias tty-ldisc-5 mkiss
# alias tty-ldisc-7 6pack
alias tty-ldisc-7 off
# IrDA
alias tty-ldisc-11 irtty
# alias ax0 mkiss
alias ax0 off
# alias sp0 6pack
alias sp0 off
alias slip0 slip
alias slip1 slip
alias ppp0 ppp
alias ppp1 ppp
alias plip0 plip
alias plip1 plip
alias ppp-compress-21 bsd_comp
alias ppp-compress-26 ppp_deflate
alias net-pf-3 ax25
# alias net-pf-3 off
alias net-pf-4 ipx
# alias net-pf-4 off
alias net-pf-5 appletalk
# alias net-pf-5 off
alias net-pf-6 netrom
# alias net-pf-6 off
alias net-pf-11 rose
# alias net-pf-11 off
alias net-pf-17 af_packet
# --- BEGIN: Generated by ALSACONF, do not edit. ---
# --- ALSACONF verion 0.4.2 ---
alias char-major-116 snd
alias snd-card-0 snd-card-opl3sa2
alias char-major-14 soundcore
alias sound-slot-0 snd-card-0
alias sound-service-0-0 snd-mixer-oss
alias sound-service-0-1 snd-seq-oss
alias sound-service-0-3 snd-pcm1-oss
alias sound-service-0-12 snd-pcm1-oss
options snd snd_major=116 snd_cards_limit=1
options snd-card-opl3sa2 snd_index=1 snd_id=CARD_1 snd_port=0x370
# --- END: Generated by ALSACONF, do not edit. ---
|